DIY REFACING GUIDE
Do-It-Yourself Cabinet Refacing
Transform your kitchen without a full remodel. Learn how to reface kitchen cabinets step-by-step using custom replacement cabinet doors, drawer fronts, paint, and simple DIY techniques.
GET STARTED
Why Homeowners Love Cabinet Refacing
Cabinet refacing gives your kitchen a completely updated look without tearing out your existing cabinetry. It's one of the highest-ROI kitchen upgrades for homeowners who like their current layout but want a fresh new style.
Save Thousands vs. Full Remodel
Refacing costs a fraction of a full kitchen remodel with comparable visual impact.
Keep Your Existing Cabinet Boxes
Your solid cabinet boxes stay in place — only the visible surfaces get a fresh update.
Faster and Less Mess
Most refacing projects are complete in days, not weeks, with minimal disruption.
Massive Visual Transformation
New doors, drawer fronts, and veneers create a brand-new look for your entire kitchen.
KNOW BEFORE YOU BUY
Is Re-dooring/Refacing Right For You?
Refacing is a great solution — but only if the conditions are right. Here's how to know.
Re-Dooring/Refacing is Great If…
Your cabinet boxes are solid and in good shape
You want a cosmetic upgrade without a full gut
You want lower cost & faster turnaround
You want a DIY-friendly improvement
Full Remodel May Be Better If…
Your current kitchen layout doesn't work for you
Cabinets are structurally damaged or water-damaged
You want a completely different kitchen layout
Plumbing or electrical is being moved
Not sure which category you fall into? Our team is happy to take a look and give you an honest answer — no sales pressure.
THE COMPLETE PROCESS
Step-by-Step Cabinet Refacing Guide
Follow these seven steps to transform your kitchen at a fraction of the cost of a full remodel.
Before ordering anything, map out your full scope. A few decisions made early will save time, money, and headaches down the road.
Paint boxes only, or full veneer?
Veneering gives a seamless look; painting is faster and more budget-friendly.
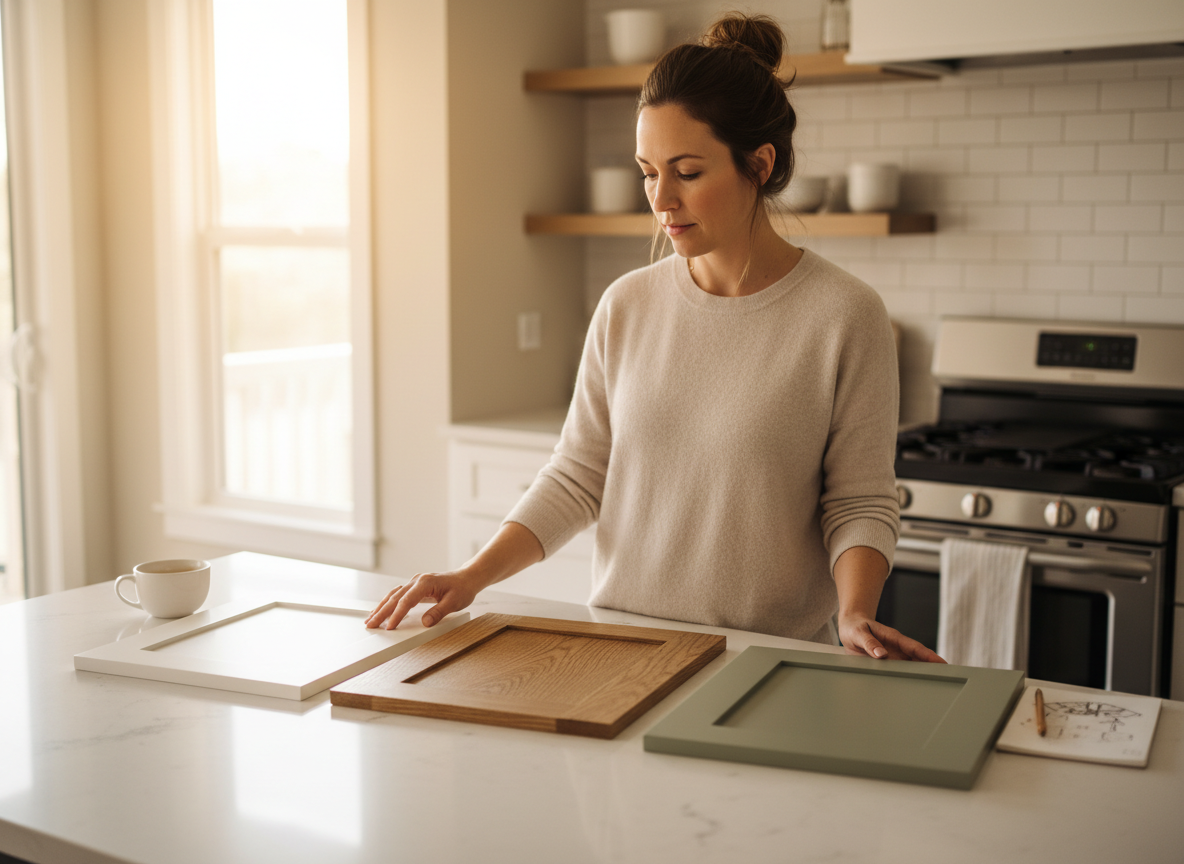
Choose your door style
Shaker, slab, raised panel — browse styles and request samples before committing.
Decide on overlay style
Full overlay, half overlay, or inset — each changes the look and hinge type needed.
Order samples first
Always test door samples in your actual kitchen lighting before placing a full order.
Tools & Materials Needed
DIY cabinet refacing only requires basic tools most homeowners already have. Depending on your hinge system, you may also need a concealed hinge jig or Forstner drill bit.
TOOLS
Screw gun
Forstner drill bit or concealed hinge jig
Pencil
Speed square
Measuring tape
Clamps
Level
Sander
Paint brush
MATERIALS
New custom cabinet doors
Hinges
Paint or stain
Cabinet knobs or pulls
Wood veneer
Sandpaper
Wood filler or repair kit
Rubber gloves
Face mask
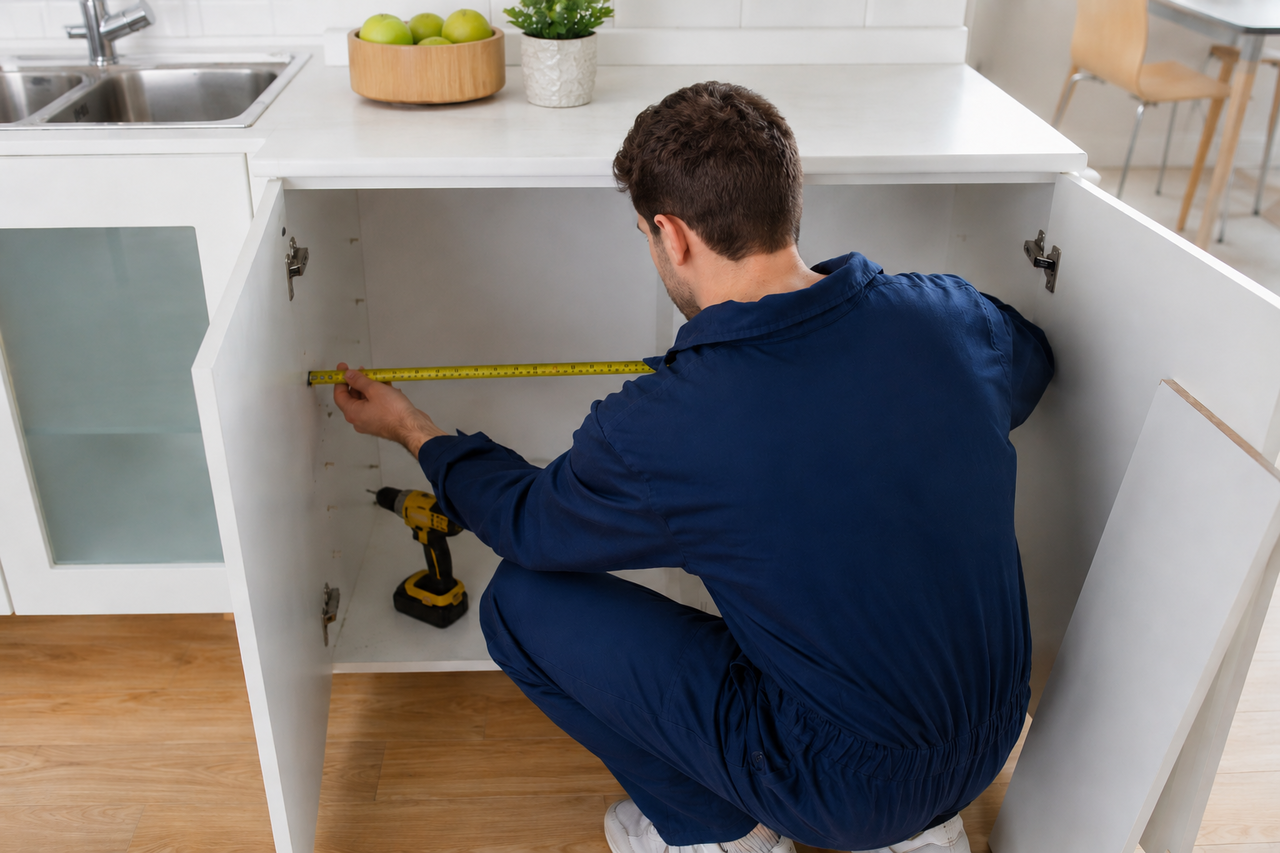
Accurate measurements are the single most important step. Measure twice, order once.
Note framed vs. frameless
Affects hinge placement and overlay math
Record hinge side
Left or right swing for each door
Check for out-of-square openings
Measure diagonally to catch warped frames
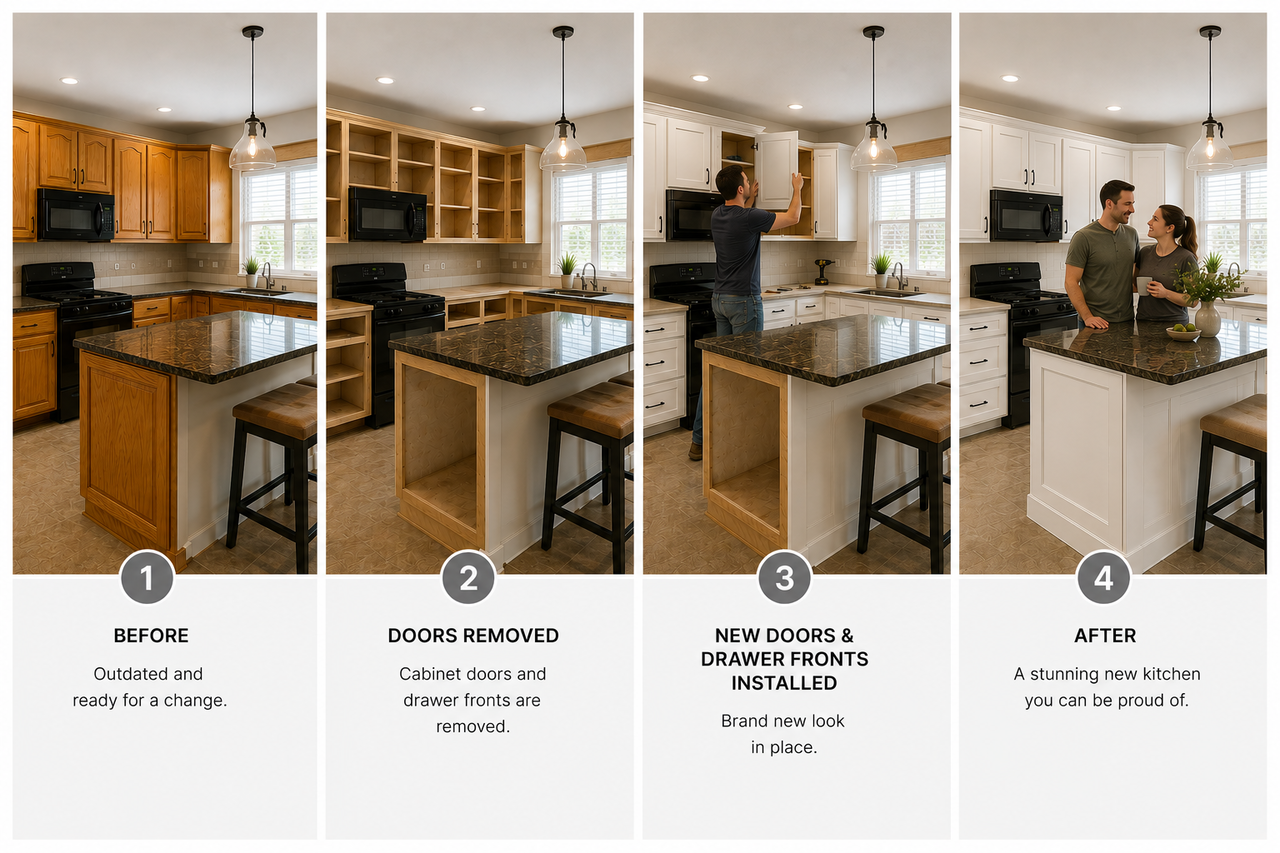
With your new doors ordered and materials on hand, it's time to clear the canvas.
1.
Remove all doors and drawer fronts — label each with tape so you know which opening it came from
2.
Unscrew and bag all hinges, pulls, and knobs — keep sets together per door
3.
Remove old veneer or laminate from cabinet face frames if applicable
4.
Lightly sand exposed surfaces and wipe down with a degreaser
This step is often skipped — don't skip it. Clean, primed boxes make everything look more professional.
Degrease thoroughly
TSP substitute or a strong degreaser, let dry fully
Fill holes and dings
Wood filler for old hardware holes you won't reuse
Prime before painting
Shellac-based primer seals wood tannins and improves adhesion
Color match your new doors
Get a chip from your door sample to match interior box color
This is the most satisfying step — your kitchen starts to look brand new.
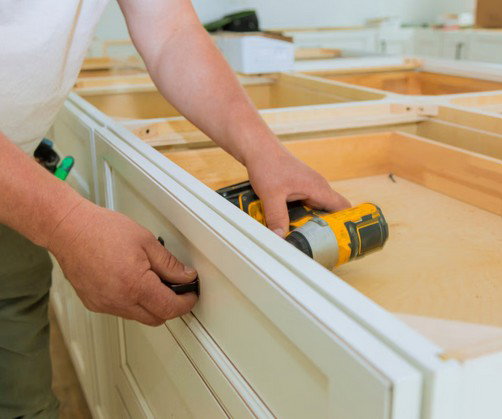
1.
Start with upper cabinets and work downward
2.
Mount hinges on the door first, then attach to the face frame
3.
Use a door jack or shims to hold the door at the correct reveal while you drive screws
4.
Attach drawer fronts last — use double-sided tape to position before drilling
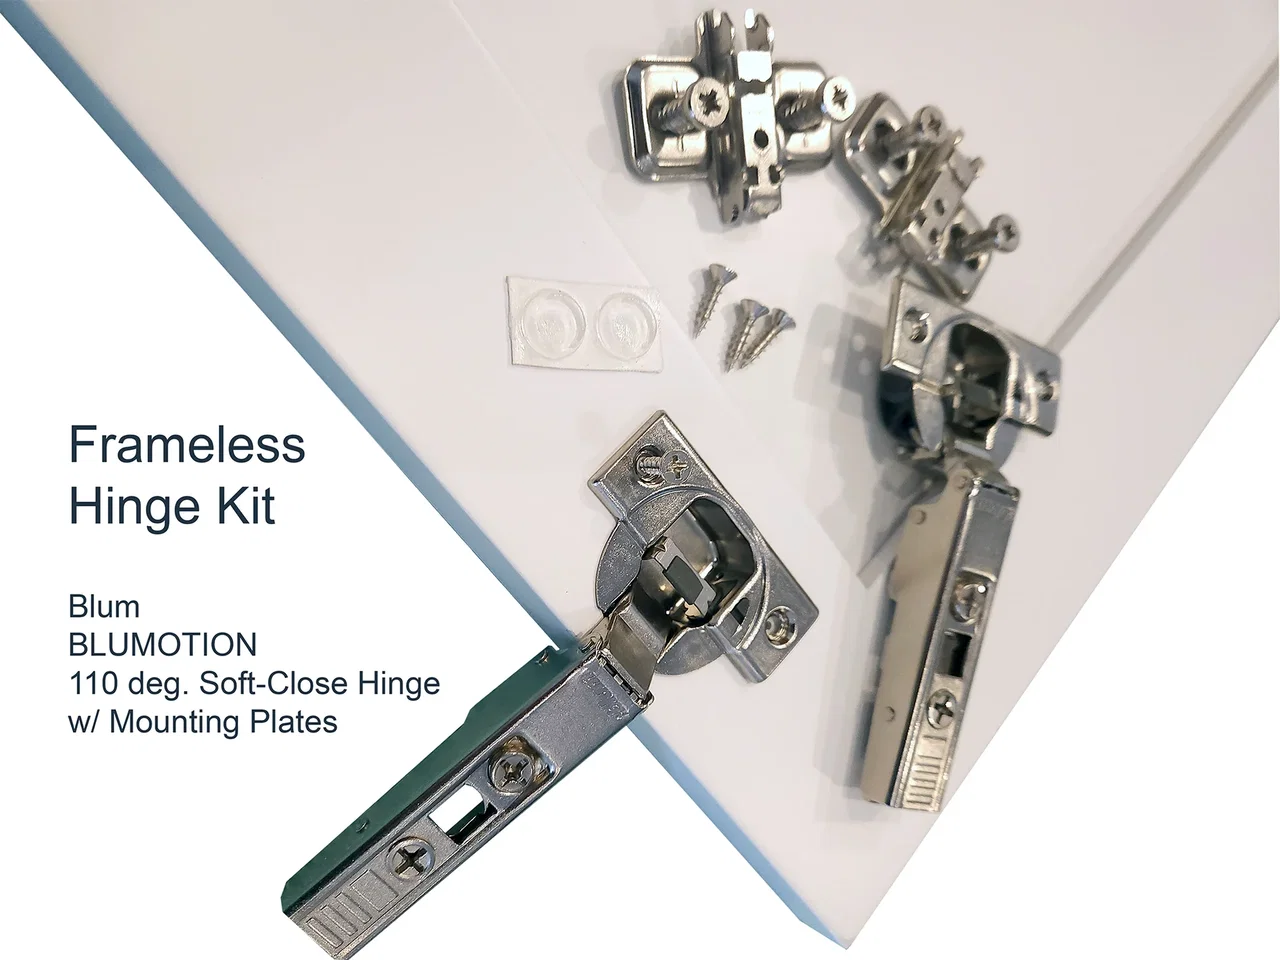
Modern European-style hinges have three-way adjustment — take the time to dial everything in.
Side-to-Side
Adjust the mounting plate screw to shift the door left or right within the opening.
In & Out (Depth)
The cam screw moves the door closer to or further from the face frame.
Up & Down
Loosen the mounting plate and slide the hinge to raise or lower the door.
💡 Tip: Step back and view from a distance — small gaps look larger up close. Use a consistent reveal (usually 1/8") as your guide.
The last step pulls the whole look together.
Install pulls and knobs
Use a hardware jig for perfectly consistent placement on every door
Inspect every door
Check for drips, gaps, or scratches — touch up as needed
Rehang any removed trim
Replace light rails, crown moulding, or filler strips last
Step back and enjoy
You just transformed your kitchen without a full remodel

TRANSFORMATION GALLERY
Real Kitchens. Real Transformations.
See how cabinet refacing transforms ordinary kitchens into beautiful spaces — without the cost or disruption of a full remodel.
FAQ
Frequently Asked Questions
Everything you need to know about DIY cabinet refacing.
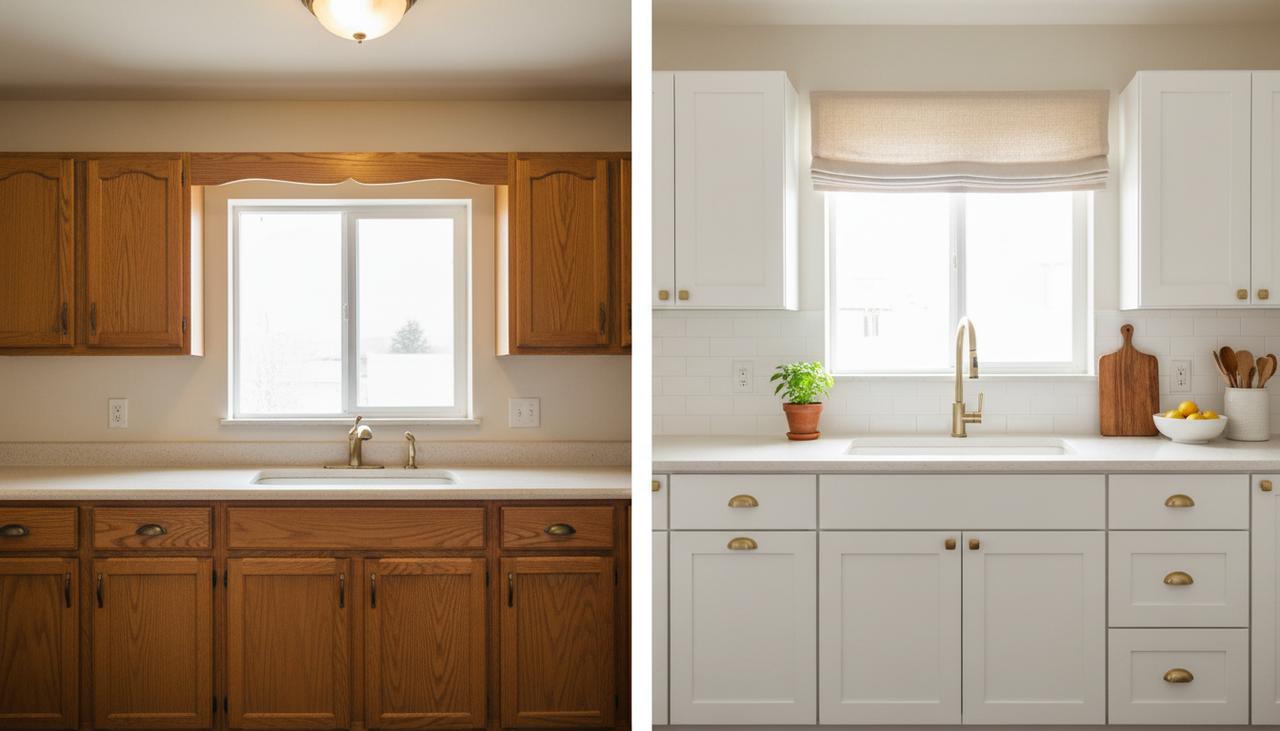
Absolutely. For most homeowners, cabinet refacing delivers a dramatic visual transformation at 40–70% less than the cost of full cabinet replacement. If your cabinet boxes are solid and your layout works for you, refacing is one of the highest-ROI kitchen upgrades available.
A full kitchen remodel with new cabinets can easily run $20,000–$50,000 or more. Cabinet refacing — even with new custom doors and drawer fronts — typically costs a fraction of that. Most homeowners save thousands of dollars while achieving a completely refreshed look.
Yes — and many homeowners do it successfully as a weekend project. The key steps are measuring accurately, ordering the right door sizes, and taking your time with hinge installation and alignment. Our step-by-step guide above walks you through every stage.
A full DIY kitchen refacing project typically takes 1–3 days for an average-sized kitchen. Painting the boxes and waiting for them to dry is often the longest part. Installing new doors and drawer fronts can usually be completed in a single day once the boxes are prepped.
If you're replacing the doors, we strongly recommend upgrading to soft-close concealed hinges. They give a clean, modern look, are easier to install than exposed hinges, and can be finely adjusted after installation. Frameless cabinets require concealed hinges; framed cabinets can use either.
Yes — that's the whole point of refacing. As long as your cabinet boxes are structurally solid and free from water damage, they're perfectly good to keep. You'll update only the visible surfaces: doors, drawer fronts, hinges, and hardware.
Shaker-style doors are by far the most popular choice — they suit a wide range of aesthetics from traditional to modern. Slab and flat-panel doors work beautifully in contemporary spaces. Raised panel styles complement traditional or transitional kitchens. The most important thing is choosing a style that fits your home and your vision.
READY TO GET STARTED
Fall Back in Love With Your Kitchen
Custom cabinet doors can completely transform your space without the stress, cost, and disruption of a full remodel. Whether you're updating a few doors or planning a full DIY kitchen refacing project, CabDoor Direct makes it easy to create a kitchen that feels uniquely yours.
CABINET TYPES
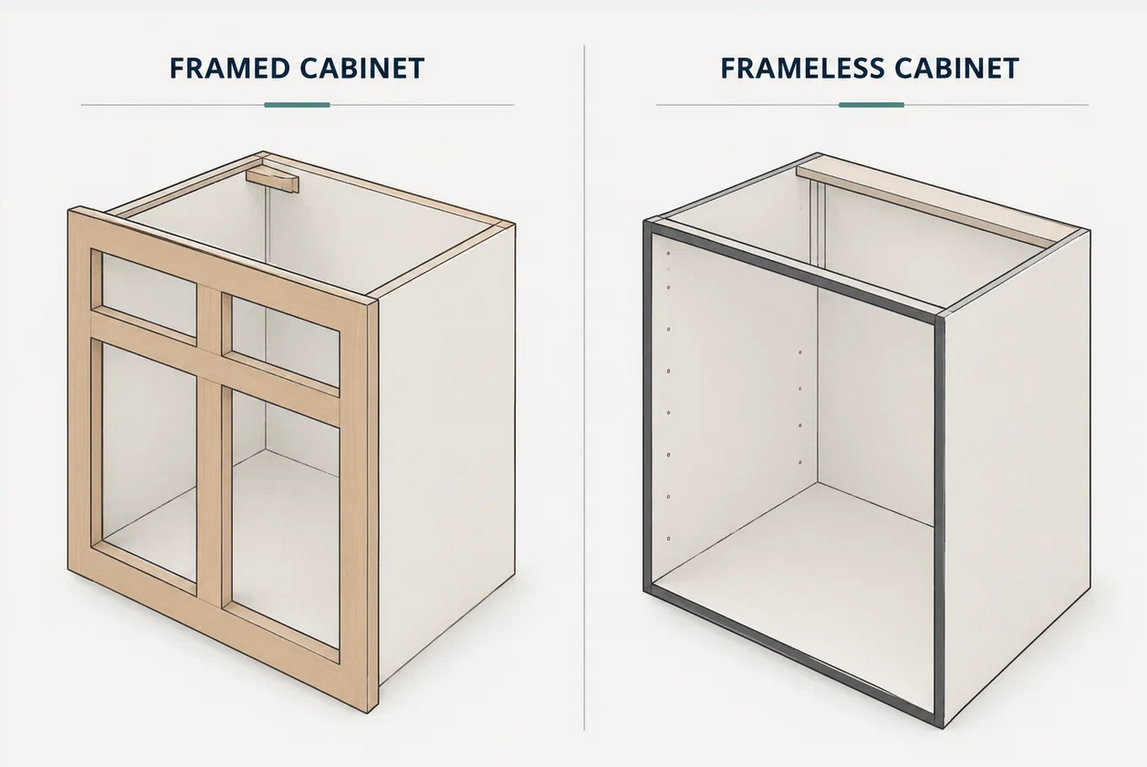
Framed vs. Frameless Cabinets
Before you proceed, determine whether your cabinets are framed or frameless. Framed cabinets have a frame on the front of the cabinet, while frameless do not.
Frameless Cabinets
To measure frameless cabinets, use the measurements of your existing cabinet doors and drawer fronts. Remember, you can only use concealed hinges with frameless cabinets.
Concealed hinges only
Framed Cabinets
With framed cabinets, measure the cabinet opening — NOT the existing cabinet doors and drawer fronts. You can use either concealed or exposed hinges with framed cabinets.
Concealed or exposed hinges
MEASURING
How to Measure Cabinet Doors and Drawer Fronts
Before taking measurements, start by drawing a simple sketch of your kitchen layout that shows every cabinet and drawer opening. Label each opening beginning with the upper cabinets on the left, followed by the lower cabinets, and then the drawer fronts from left to right.
Creating a sketch ahead of time will help you stay organized while measuring and make it much easier to identify where each new custom cabinet door or drawer front belongs during installation.
Take note of nearby doorways — if a drawer could open into a doorway or trim, record the trim thickness to ensure proper clearance.
Planning to add a valance above the sink? Measure the space between the upper cabinets on both sides.
Measure from the top of the upper cabinet openings to the ceiling or bulkhead to allow enough room for mouldings.
Mark the hinge side (left or right) for every cabinet door directly on your sketch for easy reference later.
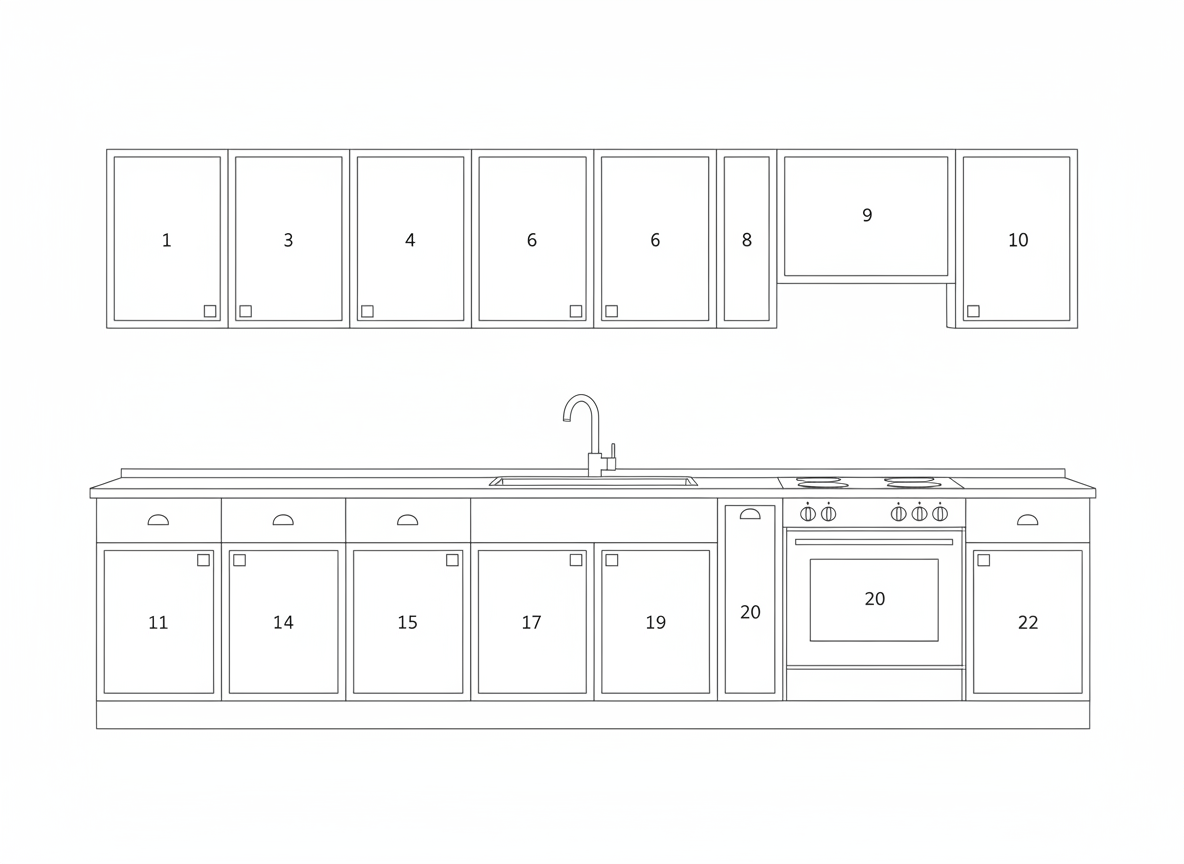
FIGURE 1